Technology Upgrades That Make Modern Racing Games More Immersive

Are you ready to rev up your gaming experience and feel the thrill of the racetrack right in your living room? Modern racing games have come a long way, thanks to cutting-edge technology upgrades that make them more immersive and fun than ever before.
From realistic force feedback steering wheels to stunning high-definition graphics, these advancements take virtual racing to a whole new level. Let’s dive into the exciting world of modern racing games and explore how these innovations are changing the game for players around the globe.
Force Feedback Steering Wheels
 Imagine the adrenaline rush of gripping a force feedback steering wheel as you navigate hairpin turns and race against competitors in a virtual world. Force feedback technology provides realistic resistance and vibrations, allowing players to feel every bump and curve of the track. This immersive experience adds a whole new dimension to racing games, making you feel like you’re behind the wheel of a real race car. With precise feedback from the steering wheel, players can fine-tune their driving skills and master tricky maneuvers with greater precision.
High-Definition Graphics
With advancements in technology, developers are able to create stunning visuals that bring races to life on your screen. From realistic lighting effects to intricate car designs firstly dominated by nascar 11 xbox 360, every aspect is meticulously crafted to immerse players in a visually captivating world. The crispness and clarity of high-definition graphics allow for a more engaging gameplay experience. You can appreciate the fine details of each vehicle and track as you race at top speeds through various landscapes. It’s not just about winning races but also enjoying the beauty of virtual racing environments.
Dynamic Weather and Environmental Effects
The immersion created by these environmental effects adds a whole new level of challenge and excitement to modern racing games. Dynamic weather systems not only make the visuals more realistic but also force players to adapt their strategies on the fly. Suddenly, every race becomes unpredictable and adrenaline-fueled as you adjust your speed and handling to conquer ever-changing conditions.
Whether it’s snowfall reducing visibility or fog making corners treacherous, each element adds depth to the gameplay and keeps you racing for more and more.
Online Multiplayer and Esports Integration
 Online multiplayer and esports integration have revolutionized the way racing games are played. The thrill of competing against real players from around the world adds a new level of excitement to the gaming experience. Engaging in intense races with friends or strangers online creates a sense of camaraderie and competition that cannot be matched by playing against AI opponents.
The integration of online multiplayer features has made modern racing games more immersive and dynamic than ever before, allowing players to test their abilities against a diverse range of opponents in real time. Modern racing games have come a long way in providing an immersive and fun experience for players. With advancements in technology such as force feedback steering wheels, high-definition graphics, dynamic weather effects, and online multiplayer integration, …

 Ensuring compliance with ever-evolving regulations is crucial for businesses of all sizes. By updating your accounting software regularly, you can stay ahead of changing requirements and avoid costly penalties. New updates often include features specifically designed to help you adhere to the latest financial laws and standards. From tax regulations to data privacy laws, staying compliant is non-negotiable in today’s business landscape.
 Bug fixes are a crucial aspect of updating your accounting software. These updates often address issues that may have been affecting the performance or functionality of the


 Identifying the right managed IT
 Thanks to the development of digital technology, the music industry has undergone a tremendous upheaval in recent years. Artists and labels no longer primarily rely on physical record sales as a source of income. Nowadays, the market is dominated by streaming services like Spotify and Apple Music, making it simpler than ever for fans to get their favorite tunes whenever they want. Music editors now have to traverse an increasingly complicated ecosystem of file formats, metadata requirements, and online distribution methods as a result of this shift towards digital.


 Probably the best way to live sustainably as a tech-savvy person is to install solar panels in your home. Solar panels allow you to generate electricity, saving you money on your energy bills and helping reduce your carbon footprint. In addition, solar panels can provide power for other gadgets in your homes, such as your laptop or smartphone. If you’re not ready to install solar panels, you can look into other renewable energy sources, such as wind or hydropower.
 Another great way to live sustainably as a tech-savvy person is to drive an electric smart car. Electric cars are much more efficient than gas cars and produce zero emissions. Smart cars also have features that can help you save on the battery, such as lane departure warning and adaptive cruise control. You can also look into hybrid vehicles if you’re not ready to buy a new car.
 The most obvious benefit of having a security system is that it reduces the risk of theft. If potential thieves know that your business is protected, they are less likely to target you. Many robbers mostly check if there are any security cameras or alarm systems before they decide to rob a place. They are scared that they will be caught if there is any security system in place. In fact, just having security signs or stickers in your windows can be enough to deter some thieves.
 Security systems can also prevent unauthorized entry into your business. If you have an alarm system, potential intruders will be deterred from breaking into your business. You can see who is trying to enter your business and decide whether or not to let them in. This is especially useful after hours when you may have employees working late. Late hours are when most robberies occur, so it’s important to have a way to protect your employees.
 Security cameras allow you to monitor activity inside and outside your business. This way, you can keep an eye on employees and customers and ensure that everyone behaves properly. You can also use security footage to identify any potential criminals. It is known that monitoring certain activities can help to improve productivity and safety in the workplace. According to research, when employees know they are being watched, they are less likely to engage in unsafe behaviors or steal from the company.
 Using online marketing software like abandoned cart recovery software can significantly increase your efficiency. With all of your marketing tasks in one place, you can easily track your progress and see what is working and what isn’t. This will help you focus on the strategies bringing you the best results. There have been many businesses that have credited their online marketing software with helping them to grow their business.
 Unlike other marketing strategies, online marketing software is more affordable. In most cases, you only need to pay a monthly subscription fee, which makes it an affordable option for small businesses and startups. Some online marketing software offers free trials, so you can test out the features before committing to a subscription. With so many affordable options available, there’s no reason not to invest in online marketing software.
 If you are worried about what your child is doing on their phone, a call logs tracker can help. You will see who they have been talking to and how long the calls were for. Suppose you suspect that they are being cyberbullied or involved in something illegal like drugs. In that case, this information can prove invaluable when proving your point.

 Lastly, one of the best advantages of reading tech reviews is learning from other people’s mistakes. By reading about other people’s experiences with a product, you can avoid making the same mistakes they did. It can save you a lot of time and money in the long run! In conclusion, there are many advantages to analyzing tech reviews before making your purchase decision. By reading about other people’s experiences with a product, you can get a good sense of the benefits and drawbacks of buying it. You can also figure out if it’s worth the price tag and see how it compares to similar products on the market.…
 It can be challenging for small business owners to understand why they should spend money out of their own pocket just so someone else can do these simple calculations, but it really does make sense.
 In every organization, there is a lot of information exchanged. The business houses vital
  There is nothing a client values more than help from their service provider. IT support systems play a significant role in providing communication channels for customers to reach businesses. Clients can contact institutions through social media, messaging, telephone, and even live chats. It boosts customer satisfaction and helps you better understand your customer needs and behaviors. Small startups can outsource IT support when they cannot keep up with the demands of business expansion.
 It is essential to ensure that the security of your business is at its optimum to avoid hacking. Every online business has a different level of user authentication. Suppose you have a business that needs a simple verification system that checks the identity of people who are entering your workplace. Bio-metric fingerprint verification will help do the job for you. Before selecting the appropriate identity verification solution, consider knowing your business demands. Some businesses, such as banks that deal with critical data, need a comprehensive identity verification solution.
 The majority of identity verification solutions offer coverage within a state because they lack access to country-specific information databases. Different countries have the laws that govern them and the regulations that they follow. You should ensure that the verification service you are using offers global coverage and has verification documents of your customers from across the world.
 The RAM is a vital feature that has an impact on the performance of the computer. That is the case if you do a lot of multitasking. For instance, you might need to edit your word docs, edit photos, and browse at once. When you have a lot of RAM, the faster it is to access data, and your applications can easily run smoothly. Make sure you get a laptop with at least 4GB of RAM. However, if you are running several applications, you should get a laptop with 8GB of RAM.
 The truth is that portability is an important consideration when purchasing a laptop. Also, battery life is important. You might find the laptop’s battery different from what is rated on the box. Different variables, such as screen brightness and the program you run, affect how long your battery can last. Rather than focusing on the hours quoted by the manufacturer, you should check the rating of the battery in mAh.
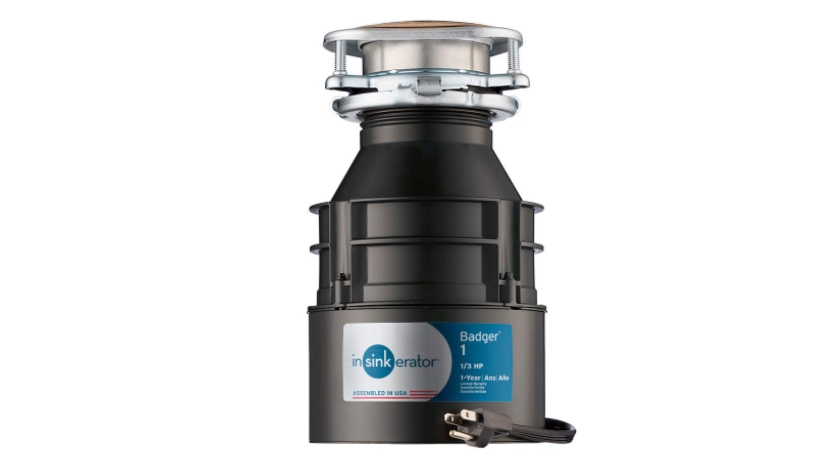
 Garbage disposals can be classified into the batch feed and continuous feed. All these types will get the work done but their mechanism of operation is quite different. If you want disposal that is easier to use, then you should consider getting a continuous feed one. For non-messy, efficient operation, you should consider choosing a continuous feed garbage disposal.
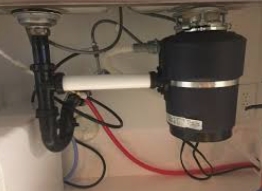 As you know, your
  Most people own a laptop. From college students, avid gamers, to professionals, a laptop serves a variety of uses. Laptops come in different sizes and technology. The size of the laptop is usually one of the most important things to consider when shopping for a laptop.

 When we are talking about internet service providers, one of the best factors that you need to consider is speed. In other words, the internet is all about speed. If you are doing your online jobs, one of the things that you always remember to have is a secure and fast speed internet. With this kind of a web, it will be a little bit easier for you to conduct most of your tasks as per the given period. When you are comparing or checking on the speed of a given company, make sure that plans known as the Bandwidth.
 Figma is a web-based design tool that works for Mac OS, Windows, and Linux. The platform allows for the collaboration of designers using a wide range of resources to create CSS, iOS, Android code, and SVG code. Thus, users have the freedom to create designs, make prototypes, and even gather feedback.

 Ideally, a reverse phone number is an online service that finds phone number and details attached to them. It achieves this by allowing the searcher to identify the caller through the numbers they often use. This technology has been proven to be quite useful especially where conventional caller ID apps are ineffective or in cases where additional information is required.
 First, a scheduling software provides the employees the efficiency to collaborate with regards to their schedules, this assists in reducing scheduling issues among your employees. By doing so, there will be an increase in your employee’s satisfaction, and it will decrease the mistakes in time off requests.
 Lastly, having an employee scheduling software assists the management in giving the resources according to the business needs and work priorities. This also assists your employees in having changes and adjustments in their plans to achieve the professional commitments. You will observe that people employed in a flexible working environment are highly motivated and more productive than employees who need to adjust their obligations and time because of a sudden change of their over or under coverage or shifts.…
 When fishing you never know if you may get stuck in the water till late hours. This only means that you’ll need a handy LED light. For them to last longer, LED lights are often waterproof and come with a LED driver that can carry low voltages of up to 30 volts. Before buying a bowfishing LED light, here are some top factors to consider:
 One may argue over the importance of an LED driver in a bowfishing expedition. Truth is, LED drivers do come in handy and are suited for their power-saving capacity. LED drivers for
 Sometimes, your cell phone may not normally work because of a minor problem that can be repaired in a few second and at a very low price. Throwing such a cell phone just to for a new can be described as unwise. First, that will be wastage of resources. Before you decide that you are going to buy a new phone, you need to check with phone Repair Company to see if buying a new phone is the better option. With the current economic situation, buying a new cell phone your current one is not totally wrecked is not a wise thing to do.

 rdized Buying
 n automated doors now have the security lock codes, so if you are not at your place, the doors won’t open until you want them to. This improves the security of homes that remain isolated during the day times. So, if you are working couple, and want to add some extra safety to your home, then the automatic doors will be a perfect choice for you.
 A good website is supposed to have a simple but professional layout. This way, the website can attract all categories of people, both professionals, and common users. Some people think that by making their website complex, they will be able to prove to their users how skillful they are in whatever services they offer. This is a misplaced idea. The complex website will always scare away users.
 Another important factor that you need to consider while designing a website is the objective of the website. You need to make sure that your website is clear on the services that you provide. Ensure that your website clearly portrays the particular information that you want your users to get. Being clear about your objectives will always provide a road map to a successful website and online ventures. Check out tulsa web designers for an effective website design that will positively transform your online endeavors.…
 Well, by now you have a blurred idea of the impact of computer technology on the economy. Due to the increasing completion, laptop manufacturers have explored all the niches in the industry. Many youngsters will prefer gaming laptop due to convenience and performance. The process of making parts smaller, adding touch pads and screen might be costly, right? The extra cost has to be covered by the manufacturers to come up with an efficient machine.
 There are those characteristics that make gaming laptop to be unique. The distinction of the normal laptop and the gaming laptop. Playing games on your laptop require extra power and perforce. Most of the laptops are designed to perform the simple functions that do not need extra performance. Most of the features in gaming laptops need additional graphic settings to promote quality. The extra power, graphics, all this does not come easily.

 Compared to the traditional doorbells, video doorbells have the benefit of night vision. During the night intruders take advantage of the darkness to commit criminal activities. With a video camera that has night vision, one is able to clearly see and record images of anything that is happening at their door.…

 The number of iPhones that are being carried around Germany has increased over the years with close to a million of these devices being carried all around the country. These numbers are clearly higher in Stuttgart and other similar cities. With this in mind, there’s only a matter of time before people start damaging their iPhones for various reasons.
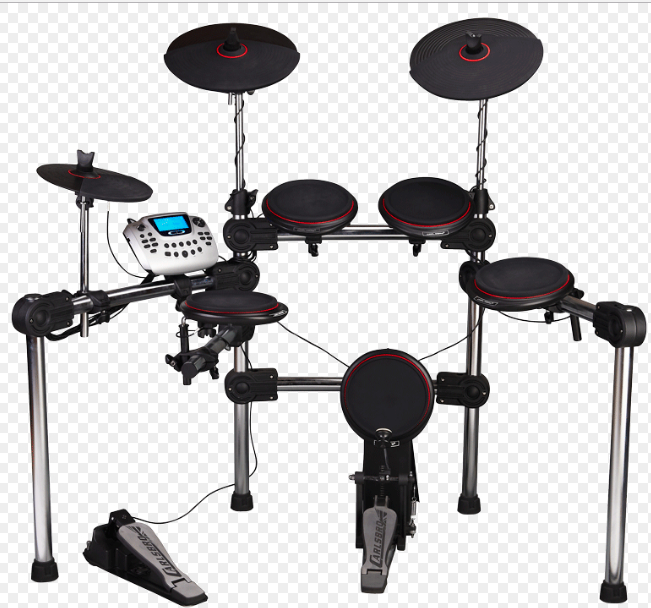
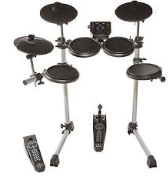 Apart from the great sounds that electronic drums offer they also have an array of sounds. You also can change from one sound to another by touching a button. You can play authentic sounds in a wide range of real music sounds accessible by your fingertips.
 You improve your physical health and fitness by playing drums. You burn up to 250 calories in an hour of playing the drums. You also build muscle when playing drums. Therefore, playing drums builds you strength and health.…
 Before walking into a store to pick a lighting cable you think to be your best choice, you first need to know if it first meets what you are looking for. If you are looking for durability, you can go for the one that has two components. These two components are the Micro USB-Lighting adapter and USB-Mirco cable. Listen, this two in lighting cable is advantageous as it gives the option of USB lighting adapter, hence permitting it to be able to connect with any given Micro USB, hence easing the possibilities of replacing the damaged cables. Thus, it can live a longer time.
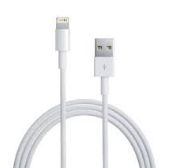 If you are opting to have a cable that you can travel with it, then choose the one that can fit in a bag, just to enable tangle-free travel. Even though this might depend on the size of your bag, it’s considered that the shorter ones support mobility more as compared to longer ones. Alternatively, if you want a long cable to help you lounge on a bed or even a sofa while charging, then you better think of a longer …


 Video intercom system was already introduced to consumers many years ago. But today, manufacturers have improved their products especially now that wireless technology is becoming increasingly popular. Instead of the traditional intercom system, you can already avail of a wireless video intercom which can provide you with more convenience.
 When you are checking the prices of the various wireless video intercoms, you should not rush into buying the cheapest one that you will see. Always consider the kind of technology that comes with the device as well as its quality.…
 a
a y, DSLR cameras` ability to change lenses has opened up a world of possibilities in the field of photography. Hence, it is paramount to pick a DSLR camera that allows for interchangeable lenses. A good camera can be fitted with a variety of high-quality lenses ranging from super long focal lengths to wide angles depending on what you are photographing. Furthermore, it is vital to note that the quality of the lenses that you use have a great impact on the image quality.
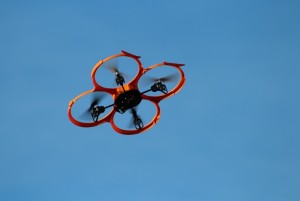 there are many cheap drones that are available on the market for this. The last thing you want is to lose an expensive one if it gets stuck on a tree or loses battery and crashes. Some great start-up models include the UDI U818A, and you will not feel too sad if it ends up in a tree somewhere.
 Speed
Speed audio capabilities of the high-end Onkyo have you reverberating to an astounding depth of 5 Hertz with an output of up to 200 watts per channel. You will need to hold on to your seat when experiencing this so that you don’t get blown away.
 The beauty of the Onkyo receivers is in their extensive price range offering the dominant receivers to a broad range of clientele.
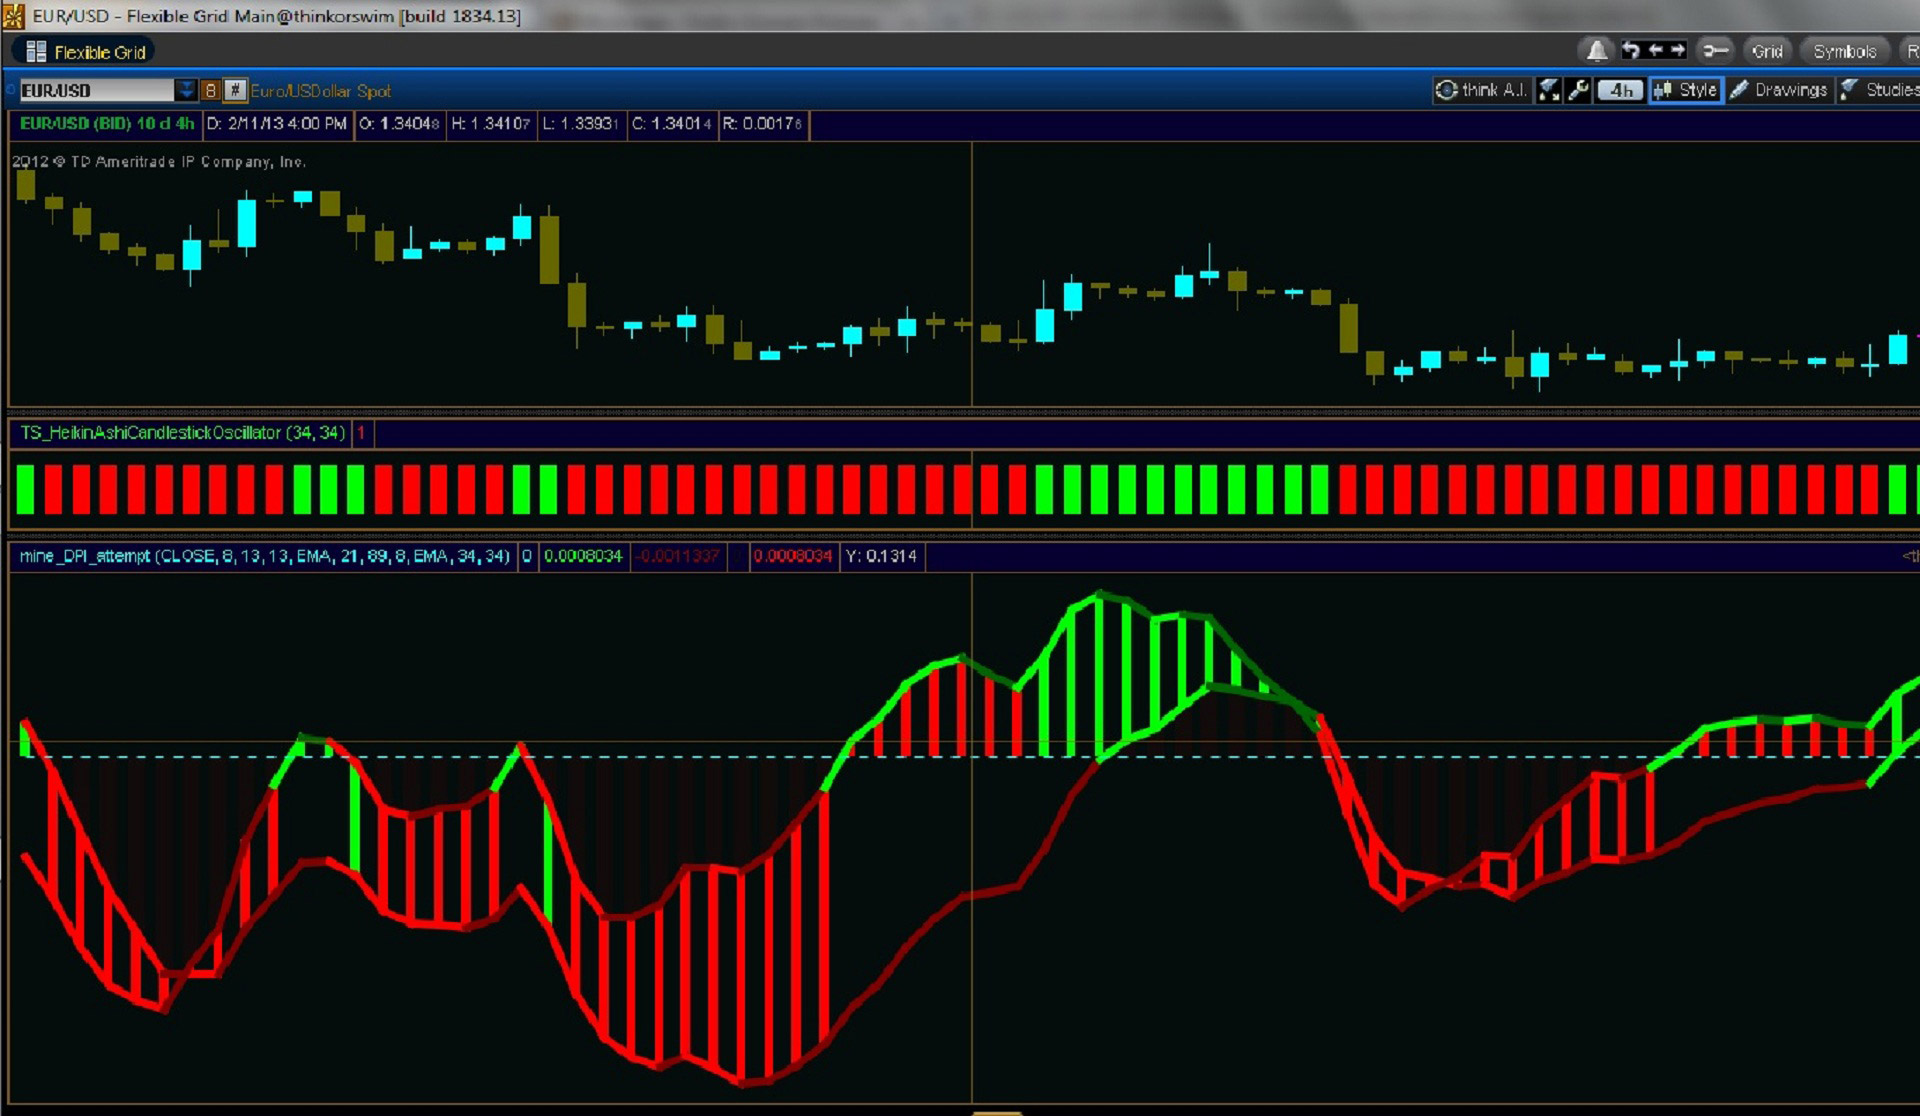

 A binary options software can allow three modes of trading, the classic trading, Martingale trading and the Fibonacci trading style. The classic involves trading in a particular manner using a similar amount of money on a daily basis.
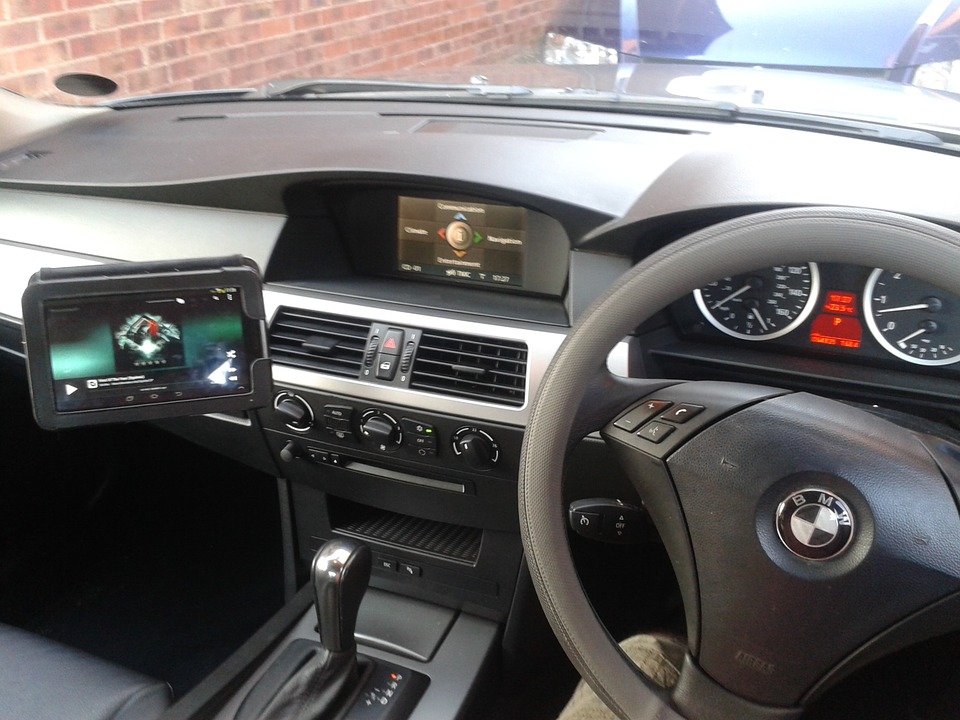

 It is helpful to get information on the parts and systems that will be utilized. Cars shops sell both the high-end and low-end equipment, parts, and system. Trying to know whether the parts are genuine and of high quality may be a challenge at a glance. It is thus paramount to investigate to prevent being ripped off. One way is by checking prices online to prevent being ripped off and exorbitantly high prices when purchasing from the shop. Alternatively one can buy their equipment and only have the installation service. However, one also need to ensure they buy the right parts.
 they do not have to worry about losing most of their money. are makes trading safe and secure.Has no updates or downloads. What one has to do is to setup their account once and wait to make profits. One is not required to download any software. Neither is one required to do regular updates. Once the setup is done, you are ready to go.
 The robots allow one to trade on different assets while using different strategies to minimize risks while maximizing the returns. Diversification in itself is a way of minimizing risks. This makes it easier for those who do not understand options trading have a way out.
 Through WordPress, creating a website or blogs has been made a lot easier. You don’t have to be a web expert in order for you to come up with a site that would make your business stand out from the crowd in the business world. But with all the exciting enhancements that WordPress offers, you need reliable and powerful wordpress hosting. As an entrepreneur who is aiming to put your business on the pedestal, it is important that you go for only the best and top-notch hosting.
 Since WordPress hosting runs with cloud servers, you can be sure that you will always have an easy and speedy access to your websites. Same goes for the consumers who are browsing them as they look for products and services that they want to purchase. Also, you can be confident that your website is up and running 24/7.
 Mac
Mac Commitment
 We offer the best prices in Mac repair and maintenance services in Calgary. All our quotations include parts, labor and any other services required. We will never overcharge. Our three months guarantee on services and parts guarantees that we will replace a part or offer the same services in case of any problems with your computer.
 giving you the best quality, this is one of the most suitable espresso machines for commercial purposes such that it has been designed to service a huge number of people.
 Saeco Philips Xelsis Evo is a fully automatic espresso machine that has got the finest touches and incredibly best performance. This one also is suitable for your commercial setting. This is because it can serve a good number of people within the shortest time possible, more so. It has got different profiles that you can set for any particular user depending on their preferences.

 with you contact list and all the data, it is now time to start with your first e-mail to your audience. In your first mail make it as simple as possible. It is always advisable to make it short and make it look like an invitation and a simple introduction to who you are.
 consideration and make sure that you buy bulbs that will be appropriate for your rooms. Some bulbs may die quickly if you put them in the wrong places.
 viewers out there who are out for something which they can find to be interesting. Perhaps one question that new Netflix users may ask themselves is how it is possible to access the many movies and TV shows available on Netflix.
 Instead, you can customize your location so that you get to have the chance to view content which you can find to be even more appropriate. You Netflix account language settings also do influence the kind of results you get after running the content search. Also, ensure that you pick the language you truly understand so that any resulting content or suggestions will be ones that you have a better grasp of and this can elevate your entertainment experience to a whole new peak.…
 which allow for quick access to specific functions and actions. The buttons are properly located and help reduce the number of complex keystrokes required, hence making the gameplay easier.
 Comfort and flexibility are what should always guide any gamer in choosing a gaming mouse. For left-handed gamers, finding an ambidextrous mouse can be ideal for a more comfortable grip. Also, depending on palm grip, one needs to choose a mouse big or small to suit the particular needs.
 Choosing a WordPress hosting that can meet your expectations and needs can be troublesome. You have to find one with the right price, performance, and highlights. If you are not careful, you might end up with a hosting that won’t work well for your website. So, before you utilize any WordPress hosting available, it is quite important that you do your homework diligently.
 Before you purchase a web hosting package, it is imperative that you evaluate the specific needs of your website. This will help you save more cash. Once you have found potential providers, make a comparison. Consider the features, customer service, and also the cost. As soon as you have chosen the best package, then you are all set to get hosted and move on to your website.
 to look for the service providers who will not only be cheaper but also provide quality services to the customers. There are various advantages of outsourcing the telephone answering services. Outsourcing the phone answering services is beneficial especially to the start-ups.
 The call answering services are still relevant even in this modern age whereby most people use mobile phones. The use of these advanced technologies like switchboard operators, instant messaging, voice recognition mail, and voicemail has seen a sharp decline in the voice answering services jobs.
 -Require expertise.

 There is already heavy internet surveillance in Thailand, and anyone who uses the internet incorrectly can be charged under the computer crimes Act, 2007 that provides sentences for up to 5 years for offences committed against the Kingdom Security.